Last year I bought a rabbit mold from Amazon.com and made her a solid chocolate bunny for Easter. It was the first she'd ever had and not only was it super easy it was a huge hit.
This year I wanted to branch out and make her first Valentine's chocolates complete with a pretty box. When I was a girl I didn't even care about the chocolates, I just wanted the pretty boxes. My daughter is the same way, presentation is key!
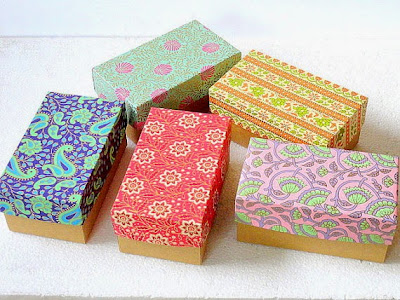
I happen to have access to some very lovely and inexpensive baking supplies from my local store, but in the absence of this, I would go to Etsy for boxes. I like the the looks of these lovelies:
Set of 5 boxes by indianbazaar.etsy.com
I'm starting with simple square boxes that hold four pieces and some small chocolate molds. The aluminum molds are pretty but are only for single use. The silicone molds can be used again and again, but you'll need more wrappers for the box. So, if you're not planning to do this sort of thing often or in bulk, then go with the disposables and save the extra expense of having to buy separate wrappers for the boxes. Check your local bakery supply store for the molds or search amazon.com for silicon molds by the sheet.

Enjoy Life Chocolate Chunks
Sweetened shredded coconut
Dried cranberries or other dried fruit
Cake sprinkles
Macadamia nuts
(obviously if the person you're giving these to is allergic to any of these, don't use them)
Before making the chocolates I set out small amounts of the fillings so they'd be ready to sprinkle in as soon as I poured the chocolate or put them on the bottom of the cup in advance.
Ok, this part is so simple, I didn't use measurements. I tossed a handful (a generous 1/3C.) of Enjoy Life chocolate chunks into a pot and put it on a burner on the lowest setting. Stir constantly until the chips are all melted and quickly put a dollop into each cup. For the nuts and sprinkles I lined them in bottoms of the cups. For the cranberry chocolates I filled the cup half way then added cranberries and then filled it to the top with chocolate. For the coconut chocolates I filled the cups nearly to the top and then lightly pressed in coconut.
Let the chocolates sit at room temp for about 30 mins and then transfer to the fridge. Let them cool in the fridge for several hours or overnight to make sure they're completely solid. Put them in a pretty box and they're ready to go. I made about nine pieces of chocolate, enough to fill two boxes and one to taste-test of course.


Post a Comment
Thank you for stopping by! I read every comment and I always try to respond. This is a polite and respectful blog, so please keep your comments polite and respectful too, or I will delete them. ;)
I ALSO DO NOT PUBLISH COMMENTS WHICH ARE INTENDED TO DIRECT TRAFFIC TO ANOTHER BLOG OR WEBSITE! It's cheap and tacky, so don't do it.
Note: Only a member of this blog may post a comment.