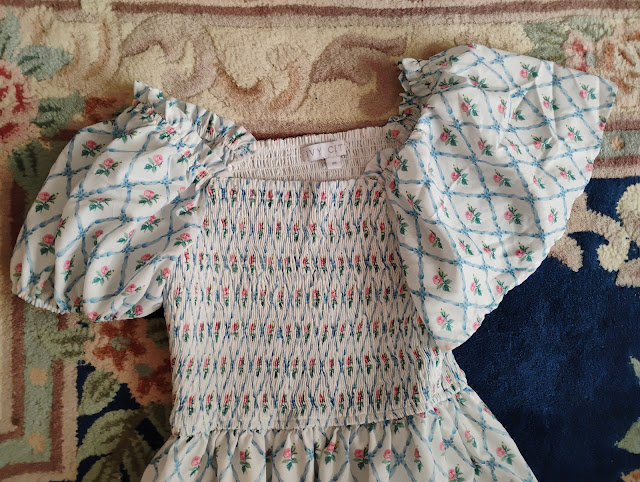
Last year the search was on for a lovely Ivy City Co. dress that slipped by me in 2023 called Sweet Rosie. I tried to console myself that it couldn't be as pretty in real life as it was in the photos; I went on a search to see it being worn on a real person and tracked it down on the blog With Wonder and Whimsy. I was smitten! It looked even better in WWW's pic than the shop's. So, I kept searching for months until I finally secured one second-hand!
The print is so lovely and I love the tiers, ruffles, and the shirred top. I was thrilled to try it on, but when I did, I realized that this sleeve is not flattering on me at all. I did these outfit photos, hoping against hope that I was wrong, but upon reviewing them, I couldn't have been more disappointed to be right. Flutter sleeves just aren't for me. Saddened that after so much searching this dress just wasn't right for me, I folded it up and put it away for the year.
Lately I've been thinking about which dresses I want to bring out for my spring wardrobe, and my mind drifted back to this dress. Perhaps the cabin fever has inspired a little creativity, but I suddenly had an epiphany that it would be the easiest thing in the world to alter the sleeves!
This post may seem rather long, but I'm going to walk you through it photographically step by step.
1. First things first, located the sleeve seam and determined it was wide enough for an elastic cord to run through, about 1-1.5mm in thickness. I measured a piece of elastic cord by wrapping it around my arm, allowing a little overlap, and then doubled it, cut, and cut it in half.
2. Next I ripped a few stitches at the seam closure as this is the most difficult place to run elastic through.
3. I pushed a small safety pin, narrow enough to fit along the inside of the seam, through the elastic and tied a knot at the end so that the pin wouldn't unravel the thread around the elastic. This really is key.4. I stuck a straight pin through the opposite end of the elastic to keep it from being pulled through the seam all the way.
5. Finally, I used the safety pin to push the elastic through and begin gathering my sleeve end. Because this is such a tiny edge, it took much longer than I thought. It took me about 30 to 45 minutes to get both done. That's OK, I just found a sunny window and enjoyed focusing on the work. At the end, I sewed the elastic ends together and restitched the seam closed.
I decided to pause after the first sleeve to show the difference between the two. I was already happy with how this was looking. Keep scrolling for the finished product!
Now this beautiful dress is just perfect for me and I am more excited than ever to wear it this spring.
Outfit Info: Ivy City Sweet Rosie Dress is from 2023. Shoes and Necklace are old.


Post a Comment
Thank you for stopping by! I read every comment and I always try to respond. This is a polite and respectful blog, so please keep your comments polite and respectful too, or I will delete them. ;)
I ALSO DO NOT PUBLISH COMMENTS WHICH ARE INTENDED TO DIRECT TRAFFIC TO ANOTHER BLOG OR WEBSITE! It's cheap and tacky, so don't do it.
Note: Only a member of this blog may post a comment.